Showing posts with label Cakes and biscuits. Show all posts

Tuesday, February 15, 2011

VALENTINE'S DAY COOKIES


Who doesn't like receiving a nice sweet treat to celebrate Valentine's day? On Sunday I found myself in the kitchen deciding between cakes or cookies. In the end the decision was easy as I had a wonderful new book called "Biscuiteers Book of Iced Biscuits" It was full of great iced biscuits for every occasion.

They basic biscuit recipe could be adapted by adding different flavourings, however I decided to go with the basic Plain Biscuit Recipe. For the first time I was going to make royal icing using egg whites. I was eager to get started.

Everything, I'm glad to say, was simple. The icing a bit messy and sticky, but that's part of the fun. The hardest part was waiting for the biscuits to cool down before I could start icing. The icing wasn't perfect but quite acceptable. I was happy with the finished product and I knew my husband's colleagues would enjoy the fruits of my labour. I made up a basket for him to take to work. I also handed a few out to my neighbours. I was so pleased to see how happy this simple act made people feel. Smiles all around.


So here is the recipe you can try it out for yourself.

This will make 24 biscuits, depending on size.

350g plain flour
100g self raising flour
125g sugar
125g cold salted, diced butter
125g golden syrup
1 large egg lightly beaten.

Sift flours into bowl and add sugar. Mix well.
Add butter and rub in until fine breadcrumb stage is reached.
Make well in centre and add syrup and egg.
Mix until mixture starts to form a ball.
Put onto floured work surface and mould into ball. Divide into 2 and wrap and put into fridge for 30 minutes.
Roll out and cut out required shapes.
Place on a baking sheet lined with parchment paper and bake for 14-18 minutes at 170c (350f) or until biscuits are starting to turn golden
Remove from oven and cool on a rack. They are fragile at this point so be gentle.

ICING
2 egg whites
450g icing sugar
Add icing sugar to egg

Whisk together, slowly at first the mix for 5 mins with electric whisk.

At this point you can divide the mixture up and colour as required.

I outlined the biscuits the flooded with a different colour. To flood you need to add some water, drops at a time until it is runny enough to fill in.
Any other decoration can be added as you wish. A steady hand seems to be the main requirement here.

In order to harden the icing set oven to 70c and pop decorated biscuits back in oven for 30 minutes. This will help biscuit from going soft and stop icing sticking to other biscuits. This for me was a great revelation I was always disappointed when my biscuits would stick to each other.

So a belated Happy Valentine's day to everyone and Happy Cooking.

Monday, January 17, 2011

STICKY TOFFE CUPCAKES with SALTED CARAMEL BUTTERCREAM


It's been a while since I made a cupcake. My younger daughter has become the cupcake Queen, making me redundant in the roll. She has become known as "cupcake Carrie". She makes the most wonderful cakes for family occasions and also for friends and colleagues.

However when I saw these I knew I had to get back in there and make a batch. For a while now I have been fascinated by the salted caramel thing that seems to be going on everywhere. So this was my chance to try it out for myself.

I loved the simplicity of the recipe as it used a yogurt pot as measurement. And using oil instead of butter I knew they would be very moist, and stay moist for several days.

I had never used Carnation Caramel before, and it certainly saved boiling the tin of carnation milk. So with all ingredients in place I got to work, or maybe I should say play, as baking is not really like work. I worked my way through the stages and before too long delicious looking cupcakes emerged from the oven. Problem was now waiting for them to cool so I could ice them.

Time passed, cakes cooled and I set to icing them. OMG, these were so delicious. I don't pretend they were healthy or low fat, quite the opposite. So if you want to ditch the diet and sink your teeth into something soft and delicious, salty and sweet, then this is for you.

I sent them with my husband for his colleagues the next day as I couldn't trust myself with them around the kitchen, especially when with my new coffee machine it would be so easy to sit down with a frothy coffee and STICKY TOFFEE CUPCAKE with SALTED CARAMEL BUTTER CREAM. See where I'm coming from?


Makes 12
120g pot natural yogurt
1 x yogurt pot sunflower oil
2 x yogurt pot light muscovado sugar
3 large eggs
3 x yogurt pot of self raising flour
1 tsp baking powder

FROSTING

100g (4ozs) softened unsalted butter
75g (3ozs) full fat cream cheese
150g (5ozs) icing sugar (I had to use a bit more as icing was too soft)
3 TBSP Carnation Caramel or Dulche de Leche
1tsp sea salt

Heat oven to 180c (350f).
Beat yogurt,oil and sugar together, add eggs, then fold in flour and baking powder with a pinch of salt.
Divide between 12 cupcake cases and bake for 15 mins, until risen and springy.
Remove from oven and leave to cool on wire rack.

Cream butter, cream cheese and icing sugar together for at least 5 mins. Add Caramel and sea salt and whisk in well.
Transfer to piping bag and swirl on to cooled cakes.
Decorate with some a sprinkle of sea salt and muscovado sugar.

Try if you can to resist. Feedback from husband's colleagues, excellent! So they're happy I'm happy.

Saturday, January 8, 2011

OATCAKES


When out shopping today I just couldn't pass up offer on smoked trout in M&S. I would make some pate, and to go with it I decided I would make some oatcakes, a healthy snack, which I'm sure everyone is looking for this time of year.

I had never made them before but had always intended to. This was the perfect time. A lazy Saturday afternoon, hubby watching football on TV, raining outside, so I headed into the kitchen to begin. I decided I would get the oatcakes in the oven before I made the pate.

Ingredients were simple and few, so in no time I was rolling and cutting and popping them into the oven for 12-15 mins. They were out cooling before I knew it. I wondered why I had never made them before.

As they cooled down I couldn't wait to try them. They were deliciously crumbly, not as dry as the commercially bought ones. They would work well with my pate, as they would with a nice piece of cheddar, or indeed with some good butter. Seems I'd waited too long to make these and will be doing again whenever an oatcake is needed.

50g (2oz) plain flour
150g (5oz) medium oatmeal
2tsps coarsely ground black pepper
1/2 tsp salt, plus extra of both to sprinkle on top
125g (4 1/2oz) cold unsalted butter, diced
milk to glaze.

Heat oven to 200c (400f)
Put all ingredients except milk into food processor and mix until it starts to bind. Add 3tbsp cold water and mix again until it all comes together.
Roll out thinly on a floured surface. Using a 7cm (2 1/4") pastry cutter cut out biscuits. You should get about 18. Re- roll extra pastry and cut out more rounds.
Place on baking tray and brush tops with milk. Sprinkle with the extra salt and ground pepper.
Bake for 12-15 mins. Remove and put on drying rack.

As you can see no big deal with these. Easy and quick and as an added bonus delicious. Think I'll take some pate and oatcakes to my neighbour who has just come home from hospital.


Monday, September 20, 2010

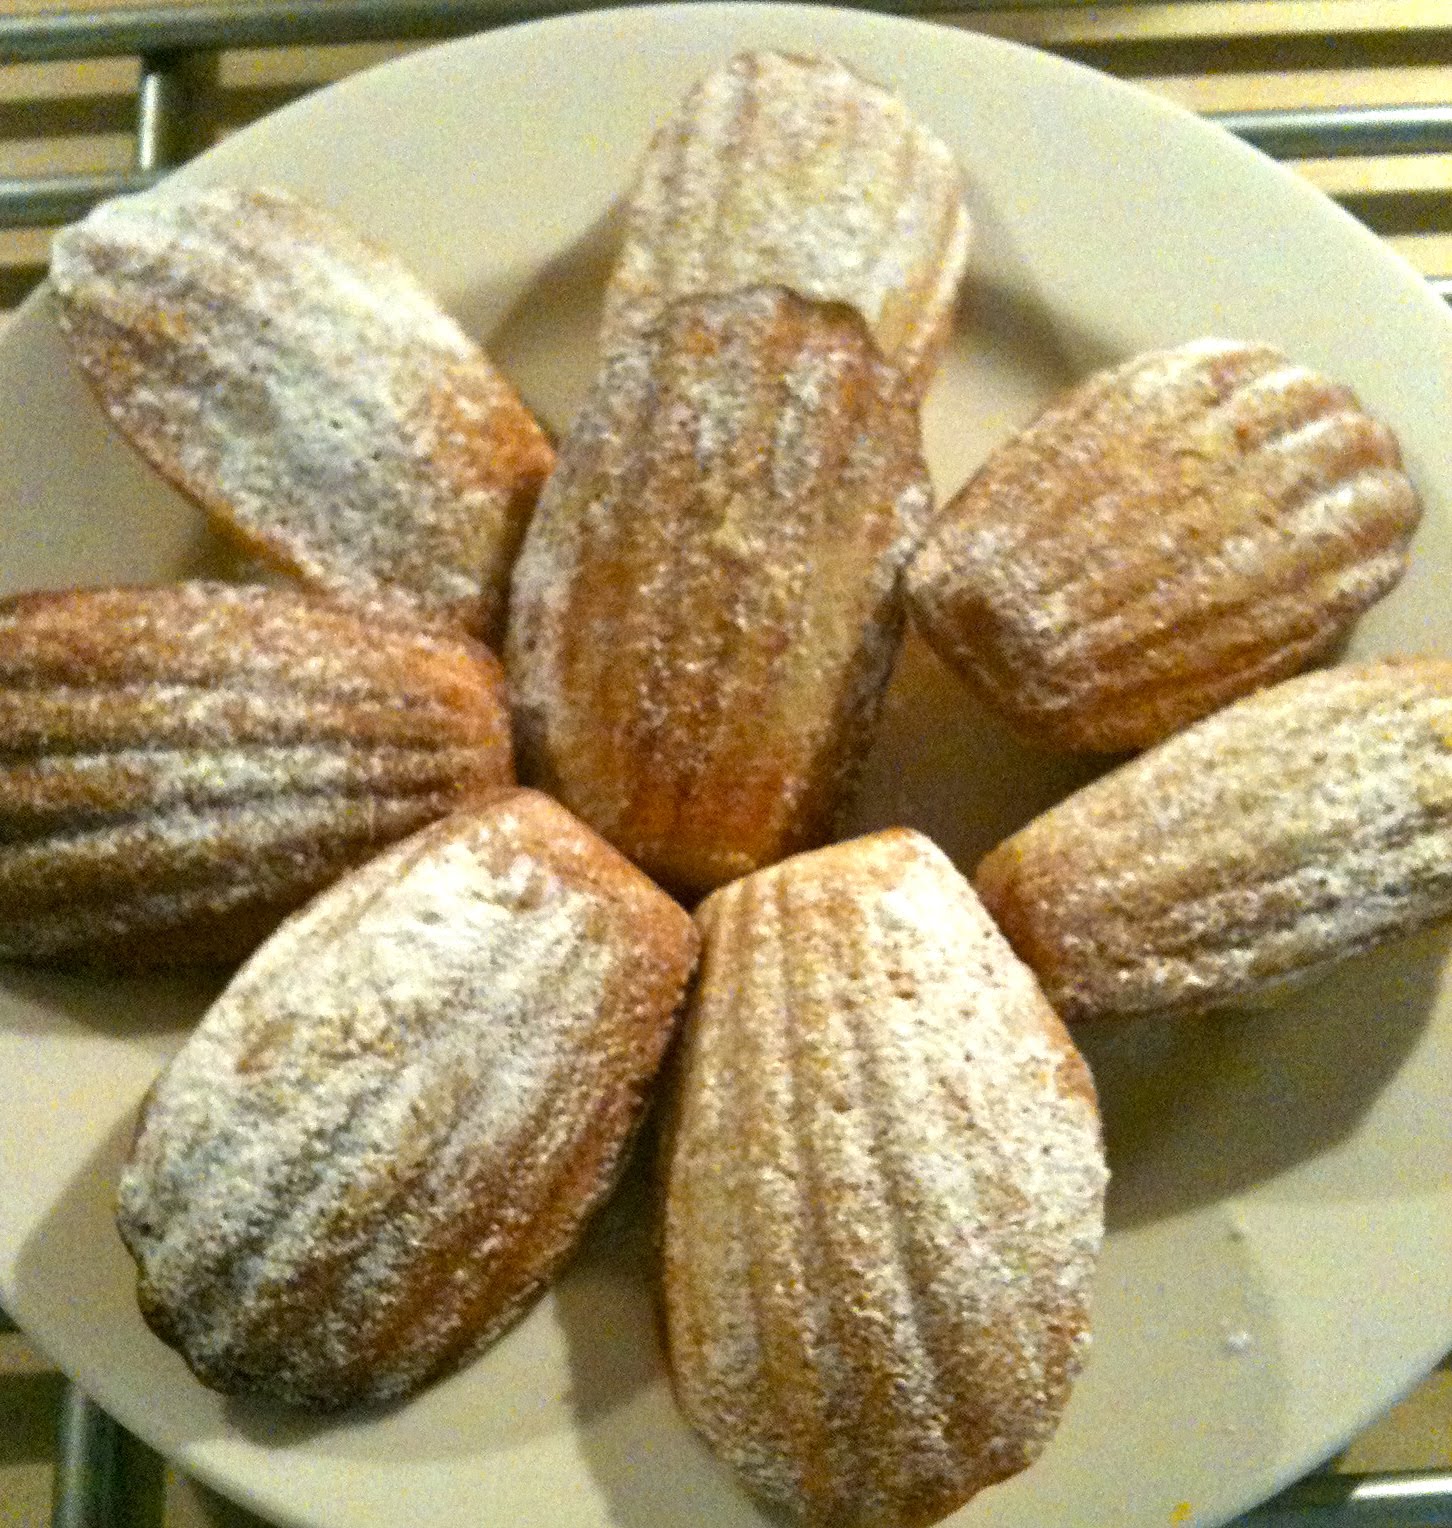
MADELEINES


A friend popping in for a coffee is all the excuse I need to switch on the oven, pull out a recipe and set to baking something tasty to enjoy over our coffee.

This opportunity arose last week when a neighbour was looking for a place to hide as the decorators had invaded her home. My door is always open for just such an occasion. I pulled a recipe for Madeleines from my file, and then began to wonder where I had put the baking tin when I moved..... All the stuff I use regularly was easy, things I don't use everyday, a bit more difficult to trace. However, with a bit of thinking and logic I soon found it, and I was ready to go.

I love to bake Madeleines, they look so professional, they take only 10 minutes in the oven, and everyone loves them. Today I was going to make lemon ones but the flavours are easily changed, and a favourite of mine is rose flavoured. Of course chocolate ones always go down well.

All the ingredients weighed and ready, a bit of mixing and before I know it the wonderful smell of baking was filling the kitchen. This in itself makes me reach for the kettle. Preparing for the moment when I can bite into my efforts and hopefully be happy with the result.

Eventually they were ready, I did a quality test before my neighbour arrived. Thumbs up. Now all that was left to do was make the coffee and sit down and enjoy an afternoon chatting with a friend. As the rain was pouring down outside I couldn't think of a nicer way to pass a few hours.

One comment I would like to make about baking Madeleines is that this is the one case when the right baking tin is important. Without it you cannot achieve the nice shape of the Madeleine. But then I am probably preaching to the converted.


A 12 hole Madeleine tin is needed for this recipe.

90g (3 1/4oz) unsalted butter, plus 2tbsp melted for greasing tin.
90G (3 1/4oz) plain flour, plus extra for dusting
2tsp clear honey
40G (1 1/2oz) icing sugar, plus extra for dusting.
1tsp baking powder
2 eggs
grated zest of large lemon.

Preheat oven to 180c (350f) and brush tins with melted butter and dust with extra flour.
Melt hone and butter in small pan. Leave to cool.
Sift flour, icing sugar and baking powder together. Stir in cooled butter,add eggs and mix carefully. Do not over mix. Finally fold in lemon zest and spoon into tins.

Put into oven for 10 minutes or until golden and risen. leave in tins for 10 minutes before turning out on to a wire rack. Finally dust with icing sugar.

Enjoy!

Monday, August 23, 2010

CLASSIC SPONGE CAKE


Sometimes I think I get so carried away trying out new recipes I forget the old favourites. The ones which always work, which taste good and I can bake without even getting the recipe out.

I don't think I will ever give up on new recipes which stare temptingly at me from magazines and cookbooks, begging me to try them, but I should not put the old ones to the back of the cupboard quite so readily. It's like ignoring an old friend, but one who will be there for you when you need them.

This recipe for a Victoria Sponge Cake is a classic recipe. It requires equal amounts of flour, butter and sugar and you can even use the eggs by weight too, yes they too are equal to the other ingredients. Add some Baking Powder set your oven to 180c (350f) mix everything together put into 2 x 20cm (8") tins and bake for 25 mins. What could be easier?

Once cooled spread raspberry jam on one half, put other half on top and sprinkle with icing sugar. Hey presto a lovely cake to enjoy with a nice cup of tea.


Here are the ingredients and method. Really it is this easy.

250g (8oz) SR Flour
250g (8oz) softened butter
250g (8oz) caster suger (superfine)
4 eggs
2tsp BP

Put all the ingredients into a bowl and mix together until creamy.

Put into 2x20cm (8") baking tins and bake for 25 mins at 180c (350f)

DO NOT OPEN OVEN during baking time as this will cause the cake to sink in the middle. However if this happens don't worry it will still taste good.

Sandwich with raspberry jam and sprinkle top with icing sugar.

Put the kettle on and settle down and enjoy your cake and tea. if you have a friend you haven't seen for a while give her a ring and invite her to join you. You'll be happy you did.

Monday, August 2, 2010

LEMON DRIZZLE CAKE


Any recipe which calls for 4 ingredients certainly has my approval, especially if it ends up tasting as good as this recipe does. I love lemon in cakes and desserts so I was initially attracted by the ingredients, and then when I the saw 4 items listed I knew I had to give it a go.
Method is so easy too.


Beat sugar and butter until creamy.
Add eggs, one at a time, mix in. Add the sifted flour and lemon zest until completely mixed.
Pour into loaf tin and bake for 40-50mins until a skewer comes out clean.
Mix together lemon juice and sugar while cake cools in tin. Pierce cake all over with a skewer and drizzle over cake. Leave until cold. it will have a crisp topping.
Slice and serve. This is one of the easiest recipes I have made in a long time and I can see it quickly becoming a family favourite.

........and I'm sure it could become a favourite in your family too.

Monday, June 28, 2010

STRAWBERRY SPONGE DROPS


With Wimbledon in full swing my thoughts turned to strawberry recipes. Wimbledon and strawberries, well, they just go together. You can't think of summer without thinking of our wonderful British berries. I truly believe in eating them when in season, when they are so sweet and juicy.

Make the start of Wimbledon the start of your strawberry eating season, they will never taste better. Also I think the anticipation of the first British strawberries makes them taste all the better. Who hasn't been disappointed by those berries we eat in depth of winter? Perhaps we are trying to capture a bit of summer, but the flavour just isn't there, and our plan fails. Strawberries for Christmas, no, no, no. Seasonal eating is the way to go.

These delicious sponges were looking at me from the pages of a summer magazine. They looked so good I knew I wanted to make them for the weekend. I hoped they would look as good as they did on the pages of the glossy magazine, but more than that I hoped the taste would would be as good as I was imagining it to be.

SPONGE DROPS (makes 24 sponges)

4 medium free rage eggs
100g caster sugar
1tsp vanilla extract
150g self raising flour


Heat oven to 180c (350f) and line 3 large baking tins
Put eggs, sugar and vanilla into large bowl.Whisk with electric mixer for about 7 mins until mixture has tripled in volume and is very thick and pale.
Sift in flour then mix in gently with a metal spoon.
Drop exact tablespoons of mixture 3cms apart on baking sheet, they will spread out.
Bake for 8-10mins until puffed and golden.
Leave to cool on sheets and peel away from paper.

FILLING

Strawberry Jam, sieved.
Double Cream
Strawberries approx 350g hulled and sliced.
Icing sugar

Spread jam over half of the sponges. Then spoon over cream and spread out. Then place slice strawberries over the cream. Another little dollop of cream can be added on top of strawberries but this is optional. Now place other sponge on top and sprinkle over icing sugar.


So I now had my strawberry sponges to enjoy while watching the tennis. Perfect. They tasted yummy and even better Andy Murray, a fellow Scot, is still in there with a chance. Could be a very good Wimbledon for me.

I can always dream!

Thursday, January 28, 2010

NEW FOUND INSPIRATION

I was just about ready to retire "thecelticcook". Inspiration for creating meals, and indeed something interesting to blog about, seemed to have deserted me, but here I am back to the printed page ready to share once again my kitchen endeavours and culinary experiences with anyone willing to listen.

What has caused this sudden reawakening in all things foodie? Simple the delivery of my first seasonal fruit and veg box from a company called Abel & Cole. It arrived full of seasonal produce, fresh and dirty as nature intended. I had also ordered some cod and fresh scallops. The scallops were picked only the day before and came with the bright orange coral still intact.
Suddenly I was excited again about what I could produce with the given ingredients. I had in front of me, onions, leeks, parsnips, carrots, cabbage, potatoes and blood oranges. I had included in my order organic eggs, Seville oranges and lemons so any day now I will be happily stirring my my marmalade into a nice sticky slightly bitter consistency. I look forward to the first breakfast where I spread it onto nice hot buttered toast and enjoy the fruits of my labours. Will keep you updated on that one.

Today I spent going through books and magazines, hunting seasonal recipes, my creative juices were flowing. Leek and potato soup would be a must, a tasty leek and potato frittata might also fit the bill. Parsnip soup? A recipe for duck with Seville orange and savoy cabbage gave me food for thought. Then I remembered a recipe for a carrot and orange cake which I hadn't cooked for a long time. That seemed a great place to start.

I decided I would serve the cod for supper. Served on a bubble and squeak cake. For any of you who do not know what that is, it is, in it's simplest form, a way to use up leftover vegetables from Sunday lunch. Always mashed potato and the whatever else you have. Today I cooked a little bacon and fried a leek until soft in the bacon fat, stirred in the shredded cabbage, mixed with the mashed potatoes, seasoned with salt and pepper and when cool enough to handle I made into little cakes. Bacon is always good with cabbage and a perfect accompaniment for fish. Then it would be fried in a little oil and the roasted cod was placed on top. I did wonder if I might put a poached egg on top. I would wait and decide later.

So in one meal I would have used several of the ingredients which had been delivered to the door early this morning. Also I would be busy thinking of what to do next. It made a change from knowing what I am cooking and then going out to buy the produce needed, certainly made me think about our supper tonight, and for the rest of the week. Thank you Abel & Cole for reawakening my interest in cooking. My husband was a very happy man tonight.

Here is the recipe for the carrot and orange cake.

175g (6oz) light muscovado sugar
175ml (6oz) sunflower oil
3 large eggs lightly beaten
140g (5oz) grated carrots
100g (40z) raisins
grated zest of one large orange
175g (6oz) self raising flour
1 tsp bicarbonate of soda
1 tsp ground cinnamon

Heat oven to 180c (375f). Oil and line the base of a 18cm (9") square tin.
Put sugar, oil and eggs into a bowl and lightly mix with a wooden spoon. Add carrots, raisins and orange zest.
Mix flour, bicarbonate of soda and spices, then sift them into the mix. Gently mix. The mixture will be loose.
Pour into the baking tin and bake for 40-45 minutes, until it springs back when you press the centre.
Cool in tin for 10 minutes then put on to a wire rack to cool completely.

Topping

175g (6oz) icing sugar
1-2 tbsps orange juice.

Mix together until smooth and drizzle over the cooled cake.


My icing has a pink tinge as I used blood oranges in the cake. These are one of my favourite fruits and I am always sorry that the season is so short.

Wednesday, August 19, 2009

COFFEE CAKE


One thing that puzzled me on my arrival in the US was the coffee cake I was being served in cafes. Every time I ordered it I was amazed at the lack of coffee flavour in my offering. It was some time before I realised that here in the States, coffee cake is merely a cake served with coffee! Puzzle over. I now know to ask what flavour the coffee cake is. Strange question. If you asked the same question at home people would think you had gone crazy.

I have a fond memory of coffee cake and that is why I think I am drawn to it when I see it on a menu. My gran used to make the most delicious coffee cake. It always would taste better the day after it had been baked as the coffee flavours seemed to develop. The recipe was passed on to me, and today as the rain poured down and warnings of tornados and severe weather filled the TV screen, yes it is summer here, I decided to find comfort in my kitchen and what better to bake than my Gran's wonderful coffee cake.

The reason I like this recipe so much is that it is a one step process. Everything is put in the mixer together and then turned into the pans. It couldn't be easier.
Today I took the liberty of baking individual cakes, in little dariole moulds. My gran was a modern thinking lady and I am sure she would approve of my change. My reason behind this was that I have some friends coming for coffee tomorrow and thought it would be nice to serve individual portions instead of a slice of cake.

1tsp instant coffee granules
1/2oz(100g) self rising flour
3 1/2oz(100g) demerrara sugar
3 1/2 oz(100g) softened butter
3 med eggs.

For the Icing

2tsp instant coffee granules
3 1/2oz(100g)icing sugar (confectioners sugar)
1 3/4oz(50g) softened butter.

Pre heat oven to 350f(180c)
Disolve coffee granules in 3 Tbsp boiling water.
Tip all of the ingredients into a mixing bowl and beat until smooth.
Divide between 6 well greased dariole moulds.
Place moulds on a baking tray and put in the centre of the oven for 20-25 mins until they have risen and are firm to the touch.
Remove from oven and turn out on to a wire rack.

When cool mix together the icing ingredients and spread on top of the cakes. I put a chocolate covered coffee bean on top and sprinkled with a little coffee powder.

How easy is that?

As I had cooked them in the dariole moulds they had a muffin top on them. I cut these off and sandwiched them together with some of the icing mixture. Mmmm, a little sample for me. I hope Gran is proud of me carrying on a family recipe and also pleased that I have updated the presentation. One day I hope my daughters will pass down this recipe to daughters or daughters-in-law.


My sample.

Monday, June 22, 2009

THE MONKEY CAKE


Seems like so long since I have blogged. It's not because I'm not cooking, I just seem to be so busy, and, of course in summer there is a lot of BBQ'ing being done.

When, last week when I received an E- Mail from my friend Joey saying she had found the perfect cake for her baby boy's 2nd birthday, I was slightly surprised when she asked if I had the correct sized cake tins for her to borrow. Why was I surprised? Well because I usually do the cakes for neighbours kids. However, I fully understand a mum wanting to make her child's own cake and I was willing to help if she wanted me but didn't want to take over the task. But on speaking to her it became clear that she would be happy for me to do the cake but hadn't wanted to ask as she knew I was busy. So make it I would. I am never too busy to make a cake especially a fun one one like this.

The cake was to be like a monkey!!! We had looked on the Internet for ideas and had come up with our favourite shaped cake, not however the preferred flavour. But that would be no problem I would just make my trusted old chocolate cake in place of the one featured.

The cake was to be baked in a pudding basin, a 3qrt (6pint) one. The first one I did came out way too flat, so I changed to a smaller 3 pint basin reduced my cooking time and this time it was a success.

Now to the fun bit, decorating. After my last attempt at a theme cake, the Trivia Cake, which I blogged, I was keen to redeem myself with the monkey. The picture looked simple enough, let me say at this point I was only producing a monkey head, not the whole body. So with a lot of chocolate frosting, a few toothpicks, to secure the ears, and with the addition on some yellow frosting I did manage to produce something looking remarkably like the picture.

I was so happy. Bobby, the birthday boy arrived to inspect my creation and to my complete delight he squealed the word "monkey" as soon as he saw it. My day was complete he had recognised the cake and now I could look forward to the party later in the day safe in the knowledge that Bobby was happy with his birthday cake. Later we would find out how it tasted but for now I was happy with the way it looked.


The party was lots of fun and the cake went down a treat.

Tuesday, March 3, 2009

MILLIONAIRE'S SHORTBREAD


At last I find myself back in the kitchen cooking. For the last few days I have been so excited by the new baby in the family I have found it hard to concentrate on anything, and as a result we have been eating out, or eating out of the freezer.

However, Saturday saw me venture once again into my domain, the kitchen. We were going to visit some Scottish friends and "wet the baby's head", which we did with consummate ease. The evening was casual and relaxed, just what I needed after the excitement of the previous few days. I needed time to wind down and draw breath. How nice it is to have friends that give you the chance to do just that.

Our friends have a grown up son Craig, who has become my number one fan since we first met almost 6 months ago. I have known his parents a bit longer. The reason for this? Well, No: 1, he loves to eat. No:2, he loves to eat Scottish food which he remembers from his childhood, and from his trips home. So who better to befriend than thecelticcook!

I have cooked several Scottish recipes for them and I decided I would take along some MILLIONAIRE'S SHORTBREAD for Craig's approval. Basically it is a layer of shortbread covered in a layer of caramel and covered in chocolate. Deliciously tempting and oh so high in calories, but a little bit of what you fancy is my motto.
Craig was happy with my offering and wasted no time in trying it out. I think it got his seal of approval.

240g unsalted butter
300g all purpose flour
120g superfine sugar.
Heat oven to 180c(350f). Blend the ingredients with a pinch of salt in a food processor until it forms a ball. Press into the base of a 23x30x6cm tin.(10x12x2")
Bake for 25mins until golden.

TOPPING

240g unsalted butter
240g light muscovado sugar
4tbs golden syrup(corn syrup)
400g tin unsweetened condensed milk.
To make the caramel put put the ingredients into a pan and bring to a gentle simmer.
Whisk, and cook for a further 10mins until thickened.
Pour over shortbread layer.
Chill until firm.

Melt 200g dark chocolate. (70%cocoa)
Pour over caramel and leave until set.
Cut into squares.
Will keep for up to a week if kept chilled.

This is a really sweet treat and a small square is usually enough. However sometimes it is difficult not to keep nibbling. Hope you enjoyed it Craig.

Friday, February 20, 2009

GRANOLA BARS


Today I thought I would try my hand at a healthy snack. When I see what's in the "healthy" bars ie: lots of various corn syrups and additives I am not sure of just how good they are for me.

I had seen a recipe in a cookbook by Ina Garten, The Barefoot Contessa. She is one of my favourite American TV chefs, and I was so glad to find her books when I arrived here. In the 5 years I've lived here I have managed to collect all her titles. Everything I cook from them is very successful and I turn to them time and time again.

As usual with her recipes it was simple and straight forward, the only problem I had was waiting the 3 hours to let them cool down enough to cut into bars. Okay, not the only problem, as when I brought my dates from the pantry they had been there for so long they were rock hard. What did I do? I simply replaced them with some figs I had left over from Christmas. Think the dates must have been from last Christmas! I see no harm in putting in fruits of choice. Variety is after all the spice of life.

2 cups old fashioned oats
1 cup sliced almonds
1 cup shredded coconut
Set oven to 350f (180c) Mix these together and toast for 12 mins, mixing 2-3 times for even colour.

1/2 cup wheatgerm
Add this to the toasted oat mixture.

3tbs unsalted butter
1/4 cup lightly packed brown sugar
1 1/2 vanilla extract
1/4 tsp salt
Place these ingredients into a small saucepan and bring to boil over a medium heat. Cook and stir for 1 minute.

Turn oven down to 300f (155c)
Add fruit to oatmeal mixture then pour over butter mixture. Stir to blend all the ingredients.

Pour into a 8"x 12" baking dish lined with parchment. With wet hands press mixture firmly into tin.
Bake for 25-30 minutes until top is golden brown.
Cool for 2-3 hours before cutting into squares.


As expected these were quite delicious. Once gain Barefoot Contessa's recipe is a winner.

Tuesday, February 17, 2009

BIRTHDAY CAKE


Can't believe how quickly weekends fly past. Here we are Tuesday already. This weekend went very quickly as it was a busy one. Valentine's Day of course, and we had a wonderful dinner at Chambers in Minneapolis. The food was delicious, as always, and not having to drive home afterwards meant we could indulge ourselves in some nice wine, and to finish the meal a glass of Hungarian Tokaii wine. This is one of our favourite dessert wines and brings back lots of memories of our time spent there. For 5 years we lived and enjoyed all that Hungary had to offer, and I have to say we enjoyed every minute of it. The people, the culture and the opportunity to explore surrounding countries. We are hoping to return for a holiday in the not to distant future.

We were unable to linger in the city on Sunday as we had a birthday party to go to on the Sunday evening. My friend's daughter, Sophia, was turning 10 years old and I had offered my services as cake maker. I had the cakes baked and ready to decorate so that would be my task for a few hours on Sunday.

It is always an honour to "do" the cake. My only instruction was that she wanted pink and green. I thought about it for few days and had a pretty good idea of what I wanted to do. As it was Valentine weekend the main cake would be heart shaped. Of course no party is complete without cup cakes so I had also baked some of them. I had baked them in beautiful silicone cupcake case which were shaped like flowers. Even before decorating they looked pretty.

Soon the job in hand was complete and I delivered the cakes ahead of time. Sophia was happy with them and that is all that matters to me. I would hate to have disappointed a little girl on her birthday! We had fun at the party and everyone tucked into my offering.

Seems like I have become the unofficial birthday cake baker for the neighbourhood children. I see this as a great honour and love to see the happy faces of children as they tuck into something special to them. Sophia was having a wonderful party and I was happy to be able to share her special day.


Another weekend another party!

Monday, February 9, 2009

FUN WEEKENDS


How quickly the weekends pass and before you know it is is Monday morning once again.
We had a lovely weekend. We had been invited to a colleague of my husband's for brunch and I was really looking forward to it. We have got to know Sallie, James and toddler Maddox over the last year and knew we were in for a fun time. It would be fun to see how Maddox is growing and hear how life for them in Minnesota is turning out. Sallie is from Georgia and I always feel for her during these cold winter months. She has done wonderful things promoting my blog down there and often see hits form there. Thanks Sallie for being one of my biggest fans. She also has a blog
handsomebabybug.blogspot.com
Take a look.

One thing I have come to realise since I started to write this blog is that people worry about what they will serve up. They seems to think I am all the time thinking of where my next blog is coming from and are afraid they are going to be the subject of a bad review. So all I want to say to these people is, being invited to your home, to enjoy good conversation and a meal cooked by someone else is a such a treat for me and I would never, ever criticise a meal cooked for me by a friend. I value my friends way to much. So relax I am just so happy to share a table with good friends, after all my name is not Martha!

I also sometimes feel high expectations are expected of me when I go somewhere. I usually take along some kind of treat, either cookies, jams or something I hope people will enjoy after I have gone. I decided, having just seen a food network programme called "Barefoot Contessa" one of my favourite TV cooks, to make sticky buns which I had seen her make earlier in the week. As they were made with pre bought puff pastry it was an easy offering to take along. I was so impressed at how easy they were to bake and at how impressive they looked and also at how delicious they actually tasted. This is about to become a regular food gift from me.

1 1/2 sticks (6oz) room temperature unsalted butter
1/2 cup brown sugar1/4 cup chopped pecans
1 package, 2 sheets of frozen puff pastry, defrosted.

FILLING
2 tbs unsalted butter, melted and cooled.
2/3 cup light brown sugar.
3 tsp ground cinnamon.
1 cup raisins.

Heat oven to 400f(200c). Put a 12 cup muffin tin onto a parchment lined baking sheet.
Combine the 1 1/2 sticks (6oz) butter with the with the 1/3 cup brown sugar until smooth.
Place 1 tbs of this mixture into the 12 muffin cups. Distribute the pecans between the cups on top of the butter mixture.
Lightly flour a board and lay out the first sheet of pastry.
Brush with half of the melted butter.
Leaving a 1" border sprinkle sheet with 1/3 cup sugar, 1 1/2 tsp cinnamon and 1/2 a cup of the raisins.
Starting with the end nearest to you roll up the pastry into a snug sausage shape. Do not press too hard. Finish with seam side down.
Trim off ends and cut into 6 even slices.
Repeat with other sheet of pastry.
Press each slice into a muffin cup, pressing down lightly.
Bake for 30 mins, until buns are golden to dark and firm to the touch.
Cool for 5 mins only before inverting onto parchment paper.
You may need to spoon some of the topping out with a spoon.
The recipe now suggest you cool before eating but this will not be an easy thing to do, I say enjoy them warm if you can.


EASY STICKY BUNS

Tuesday, February 3, 2009

MILK & COOKIES


What is more deliciously satisfying than a glass of ice cold milk and a cookie. It takes you right back to childhood when you would dip the cookie in the glass and savour the milky taste. No skimmed or semi skimmed in those days, just full cream milk. And I have to say nothing tastes better. Sure we get used to drinking milks lower in fat but there can be no doubt full cream beats them all hands down. Maybe it is time to enjoy it once again. Perhaps half a glass of "the real stuff" which I am sure will be as fulfilling as a full glass of the alternative would be an way to enjoy it once again..

I decided to take a trip down memory lane while reading NIGELLA'S EXPRESS. Here was a recipe for "Totally Chocolate Chocolate Chip Cookies." It jogged a memory, one which I was willing and ready to re-live. As a child chocolate chip cookies were not on the menu but I'm sure no-one will mind me choosing them for this recipe. I am not really a cookie baker but thought I would give them a go. It didn't look too difficult.

4oz semisweet chocolate
1 cup all purpose flour
1/4 cup unsweetened sifted cocoa
1 tsp baking soda
1/2 tsp salt
4oz softened butter
1/2 cup light brown sugar
1/4 cup sugar
1 tsp vanilla extract
1 egg, straight from the fridge
2 cups semisweet or dark chocolate chips ( I used white chocolate chips)

Preheat oven to 350f (180c). Melt the 4 oz chocolate.
Sift flour, cocoa, baking soda and salt into a bowl.
Cream butter and 2 sugars in a separate bowl. Add melted chocolate and mix.
Beat in the vanilla and egg, then mix in dry ingredients. Finally add chocolate chips.
Scoop out 1/4 cup size mounds on a line baking sheet. Use an ice cream scoop. Place about 2 1/2 inches apart.
Bake for 18-20 mins.
Leave to cool for 5 mins before transferring to a wire rack.

Now all that is left to do is to find something to occupy you until they cool. Then pour a glass of ice cold milk, sit down and enjoy. They won't last long.

Saturday, January 17, 2009

THE GIANT CUP CAKE


I had so much fun this week creating a birthday cake for Izzy. For those of you who don't know Izzy she is my little cooking companion, she lives opposite and was about to be 5 years old! A big occasion for her. I was honoured to be allowed to prepare the cake for the big day.

What would I do? No problem there as Izzy loves everything pink and her favourite book is called "Pinkalicious". I got her Mum to let me have the book and set about recreating pinkalicious' favourite cake.

Izzy wanted cupcakes. I also decided to surprise her with her own giant cupcake. I had so much fun putting it all together, mixing up pink butter cream icing, in various shades of course, and sprinkling on the finishing touches. Took me back to when my children were small. By the time I had finished there was pink icing and sprinkles all over the kitchen and I was so happy in my little pink girly world.

I know everyone has their own cupcake recipe, the only thing you need is a giant cupcake tin which are available in all kitchen stores, and butter cream frosting isn't exactly a recipe so I won't bore you with a details, instead I will let the picture of Izzy with her cake tell the story. It proves that when you are 5 years old real pleasure lies in the simplicity of a cupcake. Oh to be 5 years old again.

Thursday, January 15, 2009

BEST EVER BANANA BREAD


What better place to be on a frigid Minnesota day than in a warm cozy kitchen surrounded by my cook books with all the time in the world to ponder them. With the temperature, with wind chill, down to -40, which just happens to be where Celsius and Fahrenheit equalise, I can't think of anywhere I'd rather be, apart maybe from under my duvet!

Surprisingly, but the view from inside belies what lies beyond. The sky is blue, the sun is shining and everything is looking like a picture postcard. So with the heating racked up and the fire on I sit down to decide what to cook. I noticed earlier that I had some bananas in the bowl which wouldn't make it to the end of the week. Decision is made for me. Banana Bread it is.

My favourite recipe is on a scrap of paper torn from a newspaper some years ago. One day I will put it on the computer, or at least in print it out and file it properly, but for now I retrieve it from a recipe file where it lives for the time being.

I switch on the oven, bring all the ingredients out of the pantry and anticipate my afternoon coffee complete with the fresh baked loaf. Soon the kitchen is filled with the delicious smell of baking and of course is now even cosier due to the heat from the oven. I wonder how long I can resist cutting that first slice

3 large well ripened bananas
1 egg or 2 egg whites
2 tbsp canola oil
1/3 cup milk
1/3 cup sugar
1tsp salt
1tsp baking soda
1/2 tsp bicarbonate of soda
1 1/2 cups flour, preferably half wholewheat and half all purpose white.

Preheat oven to 350f (180c)
Lightly oil a 4x8" loaf tin.

Mash bananas. Add egg,oil,sugar,salt,baking powder and bicarbonate of soda.
Beat well.
Gently blend in flour until just moistened.
Bake for 45mins.Cool for 5 mins before removing from tin.

Today I decided to use up the walnuts left over from Christmas. I shelled and skinned them and stirred a handful into the mixture. An added health benefit. You could also mix in some chocolate chips, no health benefit, but tastes delicious.

I didn't resist too long. My late afternoon coffee was brought forward by several hours. Okay,so I enjoyed a late morning coffee today! No problem. It tasted so good.

Saturday, November 15, 2008

TEA and BICCIES!


A cup of tea and a biscuit, the great British cure all. My American friends think it sounds "cute" when I say it, and initially were somewhat surprised when I offered a biscuit with the tea. Why? Well a biscuit here is something they eat for breakfast accompanied by gravy, akin to a scone, a cookie is our biscuit, their scone, to my mind a heavy version of our scone. I believe the difference being is that we do not use eggs in the making of our scones. Keeping up?
So I now invite people to have a biccie with their tea, although most often coffee is the way to go here, biccie being a mix of biscuit & cookie. My friend Joey is slowly picking up the British lingo, and loves to use it when she can, however, I am having a lot more trouble getting her to appreciate a good "cuppa" than I am having her pick up the language nuances. We've tried Earl Grey, Green Tea, White Tea and good old PG tips all to no avail. Through gritted teeth and closed eyes she gingerly sips from the cup, tries to smile and say she is enjoying it, but there is no pleasure in the experience for her, no love for my British cuppa, so I now serve her her a cup of joe and she is so much happier, and more importantly hopefully means we will remain friends.
Yesterday for the first time I made these oat biccies, recipe thanks to my daughter. She has been telling me how good they are so in the end I had to try for myself and I have to agree, they were delicious, the perfect biccie for a cup of tea. You can even "dunk" with them, carefully! They come with the name Hobnob, but as that is an actual biscuit name, and I do not think McVities would appreciate me using it, I will call them OAT BICCIES. Do not want a legal problem!

Makes approx 24 pieces

8oz SR Flour
8oz Sugar
8OZ Porridge Oats
8oz Butter
1 tbsp golden syrup or Corn Syrup
1tbsp hot water
1/2 tsp bicarbonate of soda

Melt butter, syrup, and water in a pan.
Stir together flour, sugar oats and bicarb and add melted mixture to the dry mix.
Mix well.
Make into small balls, and flatten top slightly with a fork. Place on a lightly greased baking sheet leaving room for them to spread.
Bake at 180C/350f for 15 mins. Cool on tray then move to wire rack.
When cool they are ready to eat as is, and are delicious, although I decided to drizzle some with melted chocolate, when did chocolate not make something taste even better?

I plan to make them again soon, but this time I will add some dried cranberries to the mix and drizzle with white chocolate, giving them a Festive Feel.
Maybe McVities would like to try this out! Who knows maybe it will catch on.

Thanks to Carrie for the heads up on this one. Off now for my afternoon tea and biccie.

Tuesday, November 11, 2008

BLUEBERRY CREAM CHEESE BREAD


The snow is falling steadily so what is one to do except retreat to the kitchen and cook. With some nice music playing in the background, Ne-Yo is my find of the moment, I can happily potter around deciding what to make for supper, and try out some of the recipes I keep for a day like this. I recently spotted a recipe in a magazine for BLUEBERRY & CREAM CHEESE BREAD, I thought it would be an ideal breakfast/brunch dish, and as it is made with pre-packed breadstick dough , all the better. I am always on the lookout for dishes like this. The minimum of effort, I reserve high effort cooking for really special occasions, and the maximum result. I decided to give it a go. I had to pop out for the breadstick dough but everything else was there. It was really easy to put together, took hardly any time at all, 20 mins in the oven, it was looking good, only problem was I had to wait 45mins before I could cut into it. Patience is not my strongest point, so this was the most difficult part for me. However in the end it was worth the wait. I made a nice french press coffee and sat down to enjoy the results of my effort. I was very happy with the outcome and immediately started to wonder how I could improvise. I will in the future try it with a savoury filling, I have preference to savoury, not sweet foods, although I have to say I am not adverse to a delicious dessert. I also think it might be nice with a mincemeat filling especially around Christmas. Would make for a nice Christmas morning treat.

6ozs softened cream cheese
1 large egg separated
1 1/4 cups icing/confectioners sugar
1(11oz) can refrigerated breadstick dough

Mix cream cheese and egg yolk until soft, mix in icing sugar

Remove dough from the can and lay out on a lightly greased baking sheet. Laying the stips together and bringing them together in the middle. See pic.

Spread cheese down the middle 1/3rd and put berries on top.
Braid the dough over the mixture tucking in ends at the bottom.
Brush with egg white and bake in 350f/180c oven for 15mins.
Remove from oven and sprinkle with some sugar
I hope you enjoy this as much as I did.

PS: I made leek and potato soup for supper.
Leave to cool for 45mins before cutting. (If you can wait that long!)

Thursday, September 18, 2008

FRUIT LOAVES


I am sure most families will have a recipe like this one. I can remember my Gran making it when I was a young child, and I was always so happy when she let me sift the flour into the mixture. In my mind I had made these fruit loaves. I later remember my mum making them. I loved to come home and smell the loaves cooking, the smell would permeate all through the house. I knew I would soon be tucking into a delicious piece of loaf. I loved the taste of the sultanas, plump and warm from the oven and the flavour of the mixed spices. This was probably when I became aware of the wonderful flavour spices could impart to your cooking. On a bad day I would not be allowed my taste as they were destined for a church sale, a school coffee morning, or for the ladies who would be arriving later. I could only hope there would be a piece left for me to savour when they had gone. Although I was given the recipe by my mum I rarely baked them. Why? I do not know. However when my mum passed away 3 years ago these fruit loaves suddenly became very important to me. I now have the original hand written recipe framed in the kitchen. A constant reminder of days which cannot be recaptured. I started to bake them. My younger daughter also took on the job. So the family fruit loaf recipe lives on to fight another day.
It is amazing how our sense of taste and smell can evoke the memory and take you back to a place or time, sometimes forgotten in the busy world of today. This is one of the easiest recipes you will ever make. Take time to bake, enjoy the aromas and savour the taste. You may be building the memories of tomorrow.

FRUIT LOAVES

1 Cup of Sugar
1Cup of Sultanas
1Cup of Water
4oz/ (1 stick butter)
1tsp Bicarbonate of Soda
1tsp Baking Powder
1 tsp mixed spices (apple pie spice)
Put all of the above ingredients into a pan, or microwave, and heat until butter has melted and sultanas are plump. 2-3 mins in microwave. Allow to cool.

Meanwhile heat oven to 180c/350f
Grease two 1lb loaf tins

Whisk together 2 Eggs
Sift 1 Cup of Self Rising Flour

When mixture is cool stir in the eggs followed by the flour.
Pour into the loaf tins and bake for 35-40 mins.

Remove from oven and leave in pans for 10mins then turn out onto a wire rack to cool.

Put on the kettle, make a cup of your favourite brew, cut off the end slice, you can butter it if so desired, kick off your shoes and sit back and enjoy.